Tuesday, August 9, 2011

Mussels with Mama


Having been in Santa Barbara for the weekend, I was spoiled by my mom's culinary expertise. She likes to cook, I like to eat- it works out well.


Since our latest trip to New York, the two of us have been craving clams & mussels like crazy. You can imagine our excitement when we found an astronomic amount of mussels for a very inexpensive price.  A feast it would be.

..And Bobby doesn't like shellfish. Perfect. 
More for us.

This is the recipe that we attempted to follow, with a few added twists:

Ingredients:
  • 4 pounds mussels
  • 3 tablespoons extra virgin olive oil
  • 3/4 cup dry white wine
  • 4 garlic cloves, chopped
  • 1 shallot, minced
  • 2 lemons, juiced
  • 2 pinches of red pepper flakes
  • 1 tsp. sea salt
  • Dash of Tabasco sauce
  • 1/2 cup roughly chopped parsley

Directions:

Rinse the mussels under cold running water. Discard any with broken shells. Heat olive oil in a 6 to 8-quart stockpot. Saute the shallot and garlic to create a strong base flavor. Add the mussels and give them a good toss. Add wine, lemon juice, and red pepper flakes; cover the pot and steam over medium-high for 5 minutes until the mussels open. Toss in the parsley and steam for another minute to soften. Make sure to remove each mussel once it has begun to open at least a third of the way.


Wednesday, August 3, 2011

Mr. Goodwin, etc.

There are many, many great things about Matt Goodwin. Just look at his last name.


Moving to San Francisco a few months ago, I was looking forward to getting to know this kid that I'd soon be living with. I had heard many rumors of his excellence, notably his passion for FOOD. Knowing this,  we were most-likely (definitely) going to get along.

Yesterday afternoon, Matt shows up at the house, bike in one hand, and something colorful in the other. Having just left his community garden plot a few blocks away, Matt had just pulled up some beautiful beets. 


I still have yet to try these B-E-E-T-S...I think I'll head to the fridge, now.


Monday, August 1, 2011

bon appetit for dinner

Tomato & Cheddar Tart


I was at my parent's house this past weekend. That means many things, most importantly: an available kitchen stocked with every cooking ingredient, utensil, spice and spatula color imaginable. 

On the kitchen counter, there were about 1,342 tomatoes. All shapes, varities and sizes. They were perfect, but not going to last many more days. Something had to be done.

Sharon (yes-chef Sharon) & Jasmine was coming to stay with us for a night, so I anticipated doing something with the tomatoes in honor of their arrival. When I heard the back door open, Sharon bounded into the kitchen with a handful of what look like the most beautiful heirloom tomatoes. They were from Chino Farms. Well, no wonder.

So, that was it. I had to do something, and it had to be quick. My mom had her copy of bon appetit lying around on the kitchen table. Flipping through the pages, I found a lot of delicious recipes. With my busy schedule and lack of an attention span, most of these recipes looked like a project I was not ready to tackle. BUT, I soon found what they termed a "Tomato and Cheddar Pie." Sounded awfully rich, but this would do.

Didn't matter. It was D-E-L-I-C-I-O-U-S.

Not to mention, Alice Waters would have been proud.


Ingredients

Crust

  • 2 cups quinoa flour
  • 1 1/2 teaspoons baking powder
  • 1/2 teaspoon baking soda
  • 1/2 teaspoon kosher salt
  • 6 tablespoons (3/4 stick) chilled unsalted butter, cut into 1/2" cubes
  • 1 cup low-fat buttermilk

Filling

  • 2 pounds large ripe organic tomatoes, cored and cut into 1/4" slices
  • 2 1/2 cups coarsely grated extra-sharp cheddar (8-9 ounces)
  • 1/4 cup finely grated Parmesan (1/2 ounce)
  • 1 scallion, trimmed, chopped
  • 3 chives, chopped 
  • 1/2 cup mayonnaise
  • 2 tablespoons chopped fresh dill
  • 1 tablespoon red wine or apple cider vinegar
  • 2 teaspoons sugar
  • 3/4 teaspoon kosher salt
  • 1 teaspoon freshly ground black pepper
  • 1 1/2 tablespoons cornmeal
  • Use a 9"-diameter glass or ceramic pie dish

Preparation

Crust

  • Whisk first 4 ingredients in a medium bowl. Using your fingertips, rub in butter until coarse meal forms and some small lumps remain. Stir in buttermilk and knead gently with your hands until dough forms. Wrap dough in plastic and chill for 1 hour.

Filling

  • Lay tomatoes in a single layer on a baking sheet lined with 2 layers of paper towels. Place another 2 layers of paper towels on top of tomatoes. Let stand for 30 minutes to drain.
  • Preheat oven to 425°. Roll out dough between 2 sheets of plastic wrap to an 11" round. Remove top layer of plastic wrap. Invert dough onto pie dish. Carefully peel off plastic wrap.
  • Toss both cheeses in a medium bowl until evenly incorporated. Reserve 1/4 cup of cheese mixture. Whisk scallion, mayonnaise, dill, vinegar, sugar, salt, and pepper in a small bowl.
  • Sprinkle cornmeal evenly over bottom of crust, then top with 1/2 cup cheese mixture. Arrange 1/3 of tomatoes over cheese, overlapping as needed. Spread half of mayonnaise mixture (about 1/3 cup) over. Repeat layering with 1 cup of cheese mixture, 1/2 of remaining tomato slices, and remaining mayonnaise mixture. Sprinkle remaining 1 cup cheese mixture over, then remaining tomato slices. Sprinkle with reserved 1/4 cup cheese mixture. Fold overhanging crust up and over edges of tomato slices.
  • Bake pie until crust is golden and cheese is golden brown, 35-40 minutes (check crust halfway and tent with foil if it's getting too dark). Let pie cool at least 1 hour and up to 3 hours before slicing and serving.
Read More http://www.bonappetit.com/recipes/2011/08/tomato-and-cheddar-pie#ixzz1To6xFqOa


Friday, July 29, 2011

Coco Coco a Go Go!

Since I was young girl, I was under the impression that coconut (anything) was bad for you. Too much cholesterol, too much fat..just too much of a good thing.  Within the past year, I learned that notion was wrong. Coconuts are actually quite good for you. Delicious & Nutritious.


After yoga yesterday, our instructor invited us to join him for some home-made coconut milk, almond milk and chilled coffee. Yeah, he didn't have to tell me twice.

I had heard of making your own coconut and almond milk before, but had never tried it. Tasting his home-made coconut milk had my head spinning. It was one of the best things I had ever tasted, no joke.

I drove straight to the store and bought two coconuts, a young one and a ...regular one. I only needed to crack them open, extract the water & meat, and blend it all together! This was going to be a piece of cake.


Well, kind-of. The young coconut was easy to open with a chisel and hammer.  The regular coconut was not the same story. And definitely not worth purchasing in the future. After taking my mom's suggestion of roasting the coconut for 15 minutes at 375 degrees, I tried the same chisel and hammer maneuver, unsuccessfully. Bobby then had the brilliant idea of getting out the sledge hammer. He tried that, and that worked. Worked so well half of it flew into the pool.

And Voila! We were ready to make the coconut milk. Blend blend and I got two pints of this crazy amazing stuff. Although I think I'll stick to buying it in the store from now on.


The Best Tacos, I've Ever Had.

You heard me. That is correct. And they were made at the Van Buren's house this evening. You want to know what was in them? OK.

Organic corn tortillas. Barbequed wild shrimp from the Florida Keys, basted in chipotle pepper and adobo sauce. Barbequed sweet red corn (in their husks) sprinkled with smoked paprika. Organic black beans. Sweet potato, caramelized onions,grilled garlic & habenero pepper puree. Minced cilantro. Home-made mexican crema with chipotle peppers. Home-made barbequed tomatillo salsa & mango salsa. Shredded purple cabbage & carrots. ABSOLUTE LOVE. And perhaps one of the top 5 meals of my life.

I recommend you try them. Email me for recipes.

Soon to be featured on Yummy Soup!


Monday, July 25, 2011

Summertime Feasts

CLAMS!!


This past week, I spent some time in upstate New York with my family. Not only was I excited to relax at the lake with my book, I was stoked to be spending the week with two amazing chefs.  One of which was my mother, of course, and the other was Sharon, one of my mom's best friends.

 Upon arriving at the lake, we endeavored to plan some delicious home-cooked meals. For one of the nights, we decided to make barbequed clams with a lemon butter sauce. I had never barbequed shellfish before, let alone thought about barbequing a live animal, so this was going to get interesting.

I was in charge of removing the clams (gently- so as not to spill the salt water inside of them) off the grill when they began to open up their little shells. Sharon brushed the lemon butter sauce inside each shell. My mom supervised, wine in hand, whilst Jasmine looked at all of us with culinary aversion. 

Barbequed clams were not her cup of tea.


But they were ours!!! So much so, that we ended up making them again 2 days later
 

....MmmmmmMMMMmmmm

_________________________________________________________________________

 How to Get it Done:

Ingredients:
30 - 40 Clams Or Mussels Or 24 Oysters, well scrubbed 4 Tbsp (1⁄2 stick) Butter 1 Tbsp Minced Garlic 1⁄4 tsp Worcestershire Sauce, or more to taste
Freshly Squeezed Lemon Juice To Taste

Directions:
1. Prepare a grill; the heat should be medium-high and the rack about 4 inches from the fire. When the grill is hot, put the shellfish directly on the grill, or put them in a basket and put the basket on the grill.
2. Melt the butter in a small saucepan on part of the grill not exposed to direct heat (a shelf works well here if your grill has one); add the garlic, Worcestershire sauce and lemon juice and let the mixture warm for a couple of minutes.
3. As the clams open — some will take a minute or two; others will take longer — transfer them to a platter, and move the more stubborn ones to hotter parts of the fire. Try to keep the liquid in the shells of those that open, but don't worry if you lose some. When they're all cooked, drizzle the “barbecue” sauce over them and serve immediately.

Metrics:
Yield: 4 to 6 servings
Prep Time: About 15 minutes

Brought to you by YummySoup!


Tuesday, June 28, 2011

la vanille et à la vanille

Some of you may be thinking, really? An abundant profusion of vanilla and...vanilla?

That was my first reaction...


But, if your name is Rachel Taylor and you're involved in an extremely determined Company Cup Cake Competition, Vanilla on Vanilla is the flavor of the hour.

Last night, Rachel & I pored over her mother's baking books, Paula Deen's recipe archive and the telephone (for frequent calls to Linda of course), in order to come up with a delicious, yet distinctive cupcake recipe.

And after much frustration, excitement and preparation, we were ready.

 Rachel sifted the flour, salt and baking powder, while I browned the butter and split the vanilla bean. We tested different amounts of pure vanilla extract, splashes of buttermilk and fused the vanilla beans.


All in all, we were an amazing cupcake-designing team.


and now for the cleanup..


Thursday, June 23, 2011

In a Cookie.


..freshly baked. And just a preview for what is yet to come.

Wednesday, June 22, 2011

Midnight Posts..in Paris?

..as you can see, tomorrow's petit dejeuner is already on my mind.
Perhaps this cafe will provide some inspiration.

Tuesday, November 16, 2010

Fall Fruit Dejour


This morning, I found myself rummaging through my fridge looking for something tasty to eat.  I found the essential breakfast items; Greek yogurt, fresh berries, mint chocolate soy milk (for coffee purposes), and granola.  Meanwhile, something bright orange caught my eye.

A persimmon.


For being one of the tastiest autumnal fruits on the market, persimmons are still a mystery to many.  There are generally two types of persimmons: those that bear non astringent fruits and those that bear astringent fruits.  Both varieties can vary in shape and color, ranging from light yellow-orange to dark red.  

The non astringent persimmon is more round in shape and can be eaten when crisp.  They have a thicker skin and look similar to that of an apple.  The most common varietals for this persimmon are the Fuyu and Imoto. 


Persimmons are extremely nutritious, with excellent sources of vitamin A, vitamin C, and rich in fiber.  They contain many phytochemical antioxidants such as: epicatechin, gallic, proanthrocyanidin, and p-coumaric acids. Persimmons have even been found to have higher levels of dietary fibers, total phenols, and other minerals than apples!  Some laboratory studies show that persimmon consumption may help reduce your total cholesterol and lipid peroxides.

________________________________________

If you're curious how to start incorporating persimmons into your daily diet, try some of these tips:

  1. Cut the Fuyu variety like an apple and eat whole, or in salads
  2. Puree the Hachiya variety to add to drinks, smoothies, or to make cookies & muffins
  3. Make salsa with diced Fuyu, with avocado, cilantro, tomatillo, onion, and chili serrano
  4. Enjoy a Hachiya persimmon as a mid-morning snack by simply spooning the fruit out of the skin.

Persimmon Muffins
Serves 12 * Total time: 20 minutes
 This recipe contains 8 powerhouse foods

8 oz fresh persimmon (pureed)                                     4 oz dry-roasted pecans
1 cup enriched all-purpose flour                                   2 large eggs
1 cup whole wheat flour                                                 1/8 tsp. ground allspice/cloves
1/3 cup agave syrup                                                       1/2 tsp. ground cinnamon
1/4 cup canola oil                                                           1/4 cup of purified water
1/3 cup California golden raisins                                 1 tsp. baking powder/ soda

To begin, presoak raisins in water. Preheat oven to 375 degrees.  Blend together the persimmon puree, agave, eggs, spices, canola oil, baking powder & soda until very smooth.  Add flour and hand mix until smooth.  Drain raisins into muffin mixture.  Add raisins and nuts by gently folding them in.  Be careful not to overmix because this will change the consistency of the muffins.  Bake until done, about 13 minutes.  When cooled, dust the muffins with a little powder sugar and cinnamon.

Friday, November 5, 2010

le Nouveau Rock Saké.

Saké (pronounced /ˈsɑːkiː/ in English and is a Japanese alcoholic beverage made from rice.


To many of us, saké may be an unfamiliar beverage.  However, growing up in a house where extensive wine knowledge is a requirement to succeed in life, I was curious to learn more about this "rice wine."  So, one evening my boyfriend and I went on a date to a nice sushi bar in Del Mar.  We felt adventurous and ordered the house hot saké.  We were not thrilled, both finding it harsh and fairly unpleasant.  I decided that warm rice wine did not compliment my sushi.

Not too long after this, I applied and got a bar tending job in San Diego.  Little did I know that this would further my distaste of saké.  I was instructed to remember the thousands (ok, maybe hundreds) of sakés that we served.  All the bottles looked different.  All the names were different.  All the names were written in Japanese characters.  And there were different types of saké!  I was screwed.  To add insult to injury, the girl who trained me might have been the craziest human being on planet earth.  If she had anything to do with my saké training and knowledge, I had to go asap.

After this (extremely traumatic) experience, I decided to leave saké alone for the moment.  I had other beverages of choice, and I was ok with that.  That was until my best friend Rachel Taylor got a job with Rock Saké.

I still remember the day that I met Rachel for lunch in Westwood when she told me the good news.  She had just heard word that she had gotten a position within the rapidly growing saké company.  The single saccade of her excitement immediately made me happy for her.  I made a vow then and there that I would have an open mind about saké.  Little did I know that she would introduce me to a saké unlike I had ever tasted before.


Rock Saké is regarded as a top shelf saké.  In essence, it is the ultra premium beverage with a pronounceable name.  I thought putting Rock Saké on our cocktail menu at my restaurant sounded like a good idea.  We serve a wide array of international customers who might find Sakétinis appealing!  And to make a long story short, we did.  We featured Rock Saké premium cocktails from May-September 2010.  It was a hit.

Rock Saké promotes two different saké grades:

  • Rock Saké Junmai Ginjo: This saké comes in the white bottle and has a clear color.  It has a subtle hint of lime and feels cool to the tongue.  It comes from all natural California milled rice and pure spring water from the mountain ranges of Oregon.  This saké is gluten free and comes from only the finest ingredients.  Junmai Ginjo can be substituted for vodka in cocktails easily. Try a Saké Lemonade martini with a sugared rim, or Cucumber Mojito.  For an extra refreshing flavor, add muddled cucumber and/or elderflower liqueur.
  • Rock Saké: Cloud: This is an unfiltered saké, with a cloudy opaque appearance.  Cloud is a "nigori" sake that has a slightly sweeter flavor than the Junmai Ginjo.  This is the most traditional form of saké and contains no sulfites, additives, and is also gluten free.  This is my personal favorite as its flavor compliments any cocktail.  It has a wholesome flavor with herbaceous notes, coating the palate delicately.  Try the Cloud with sparking grapefruit juice and a splash of lime or jasmine liqueur.  Or better yet, drink it simply by itself!  Make sure to shake this bottle up!


If you would like to try a bottle of Rock Saké, please contact either myself or Rachel.  We would love to introduce you to this refreshing beverage!

    Tuesday, November 2, 2010

    the trouble you get into with a free afternoon and a little inspiration

    autumnal Baking.
    Part I
     
     After getting my hair done, running many pointless errands, and finalizing costumes designs, much of last Friday was spent in the Van Buren kitchen.  This was a treat as a little holiday baking was on my to do list (and had been since Labor Day Weekend.)
    This may seem a little extreme to some of you.  However, if there's one thing that I plan ahead for, it's the holidays.


    I had all the decorations assembled, the butter at room temperature, and the cookie sheets greased.
    I was ready.
    In addition to my audience: the house cat we call Pixie.


    After making dozens of sugar cookies, I began to realize I would also need time to decorate them.  This I had failed to take into account time-wise.  I had been baking for 3 hours without melting the chocolate or cracking open the decorating materials...woops.


    When all was said and done, the cookies turned out pretty well.  I could have spent a little more attention to detail, however, I had to attend Ben's special (strictly costume) birthday party that beginning in only a matter of minutes.  Baking was not a legitimate excuse for being tardy.


    ... (shot taken in first few minutes of arriving.  Consumed very quickly thereafter.)

    Friday, October 29, 2010

    the mascot

     modern HALLOWEEN.

    As you may already be aware, pumpkins are pretty neat.  They remind us of the autumnal season; crisp evenings, yummy treats, and of course Halloween.  We all need one.  

    Our pumpkin defines us.


    This Halloween, I decided to transform my pumpkin into a new personal masterpiece.  No more glowing faces or spooky silhouettes.  I needed a more modern approach to capturing my spirit in an orange squash.

    Au naturel. 


    I promise you that this decision was well thought out.  
    The inspiration came from a little light reading I did regarding pumpkin nutrition.  As many of my faithful readers are well aware, I have a minor interest in food and its many health benefits.  Therefore, instead of carving my pumpkin, I decided to embrace its natural state.  My little orange blob might be one heck of a snack after all!

    The pumpkin, or cucurbita maxima, has a long history that stems back at least 7,500 years ago.  Pumpkins were an important part of the Native American diet and culture.  They were used for food consumption, mats, and other products that could be made from the shell.  The first pumpkin pie was in fact made by early settlers that noticed the Native Americans utilizing the squash.  They filled a hallowed-out pumpkin with spices, milk, and honey and then baked it.

    Yes, absolutely delicious if you ask me.


    Pumpkins are produced mainly in the United States, India, China, and Mexico.  We all should be eating this delicious squash, as it is an excellent source of potassium, fiber, vitamin A, beta-carotene, and lutein.  Pumpkin seeds are also a good source of omega-3 fats and may help lower cholesterol.  According to my favorite book of all time, "101 Foods that can save your life," consuming pumpkin seeds may help reduce enlarged prostate glands.  In addition, pumpkin may alleviate some of the symptoms related to diabetes.


    There are basically 2 main forms of pumpkins.  The one we most typically recognize are those that are best used for carving.  These pumpkins are not good for personal consumption.  Canning pumpkins are better to use in pies, breads, and other forms because they are sweeter and less watery.  Make sure to choose a pumpkin that is heavy and has a good shape.  Once cut open, the pumpkin must be cooked the same day.


    A few good tips on the general consumption of a pumpkin:
    1. Dice sweet pumpkins up.  Sprinkle a pinch of nutmeg and cinnamon, and drizzle a little olive oil onto the pieces.  Bake on a cookie sheet at 375 degrees until pumpkin pieces look brown and tender.
    2. Puree pumpkin, carrot, ginger, onions, and leeks together.  Add vegetable stock and some spices to make a simple, yet delicious soup.
    3. When roasting pumpkin seeds, first rinse them thoroughly.  Spread the seeds out evenly on a cookie sheet.  Drizzle butter or oil on them to give them extra flavor.  You may also had some brown sugar and salt to make them EXCELLENT.
    Sunday, October 10, 2010

    a most common consumption

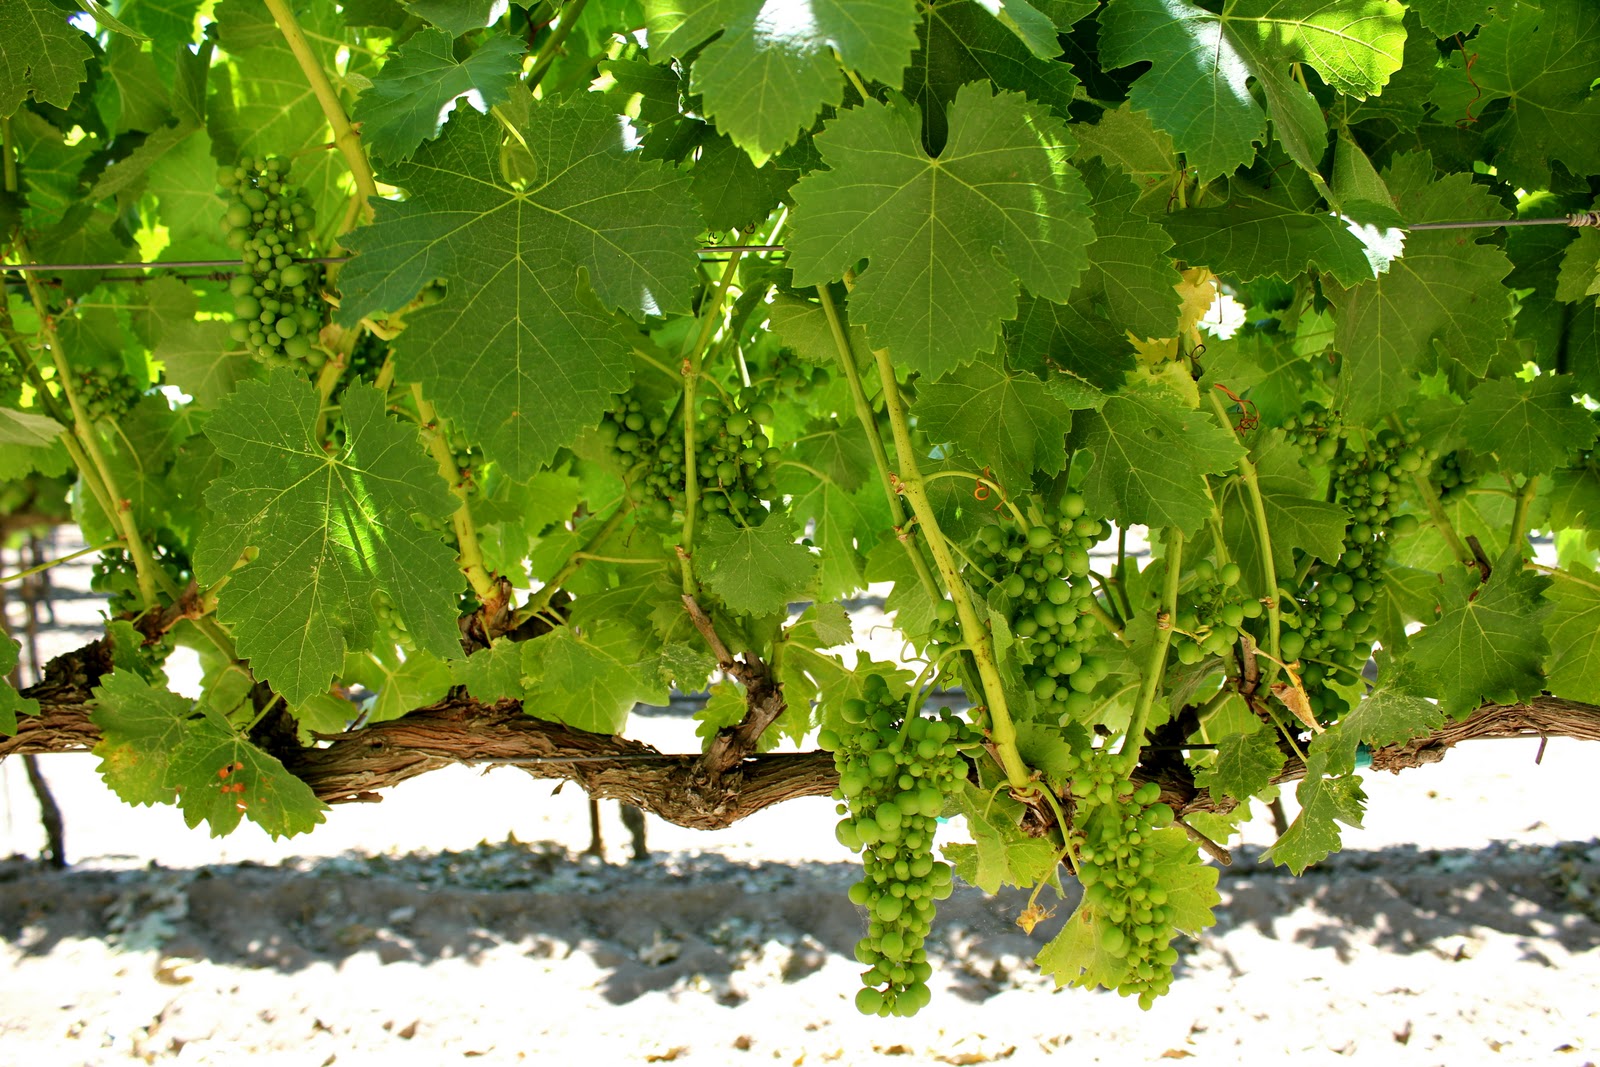
    GRApeS
    Vitis

    Grapes seem to have been a frequent occurrence in my life these days...  From the casual glass of wine to the frequent snacks by the pool- grapes are my common consumption.

    Grapes grow all over the world.  They were originally cultivated in Caucasia, near present day Iran, in 6000 B.C..  Grapes were used for wine making during the Greek and Roman eras.  From here, the grape's popularity and usage spread throughout Europe.  In the 17th century, grapes finally made their way to the United States, namely the central valley of California.

    And just in case you didn't already know, California is pretty great.


    There are literally thousands of varieties of grapes that range in both color and form.  However, only about 20 varieties make up the vast majority of what we consume.  That's pretty crazy to think about.  The most popular of those consumed are European grapes, wine grapes, French hybrid, and North American grapes.

    Grapes contain powerful antioxidants .  Studies show that they are abundant in the predominant antioxidant, proanthocyanidin.  This has 20 times greater the antioxidant power of vitamin E and 50 times greater than that of vitamin C.  Another reason why you should eat grapes is their resveratrol component.  Resveratrol is a key phytonutrient found mainly in the skin of grapes.  It has both anti-carcinogenic and anti-inflammatory properties.  Red grapes are especially healthy because they contain the carotenoid lycopene, which may help inhibit the growth of certain types of cancer cells.


    Grapes are best when they are plump and free of wrinkles.  They are stored best when they are unwashed and placed in a paper towel and put inside of a plastic bag.  Keeping them cool in the fridge will prolong their freshness.  Although, grapes will also keep for several days at room temperature.


    Freezing grapes also makes a tasty snack, as my housemates can attest to :)

    Friday, October 8, 2010

    seasonal saturdays

     the local Farmer's Market. Santa Barbara, CA.